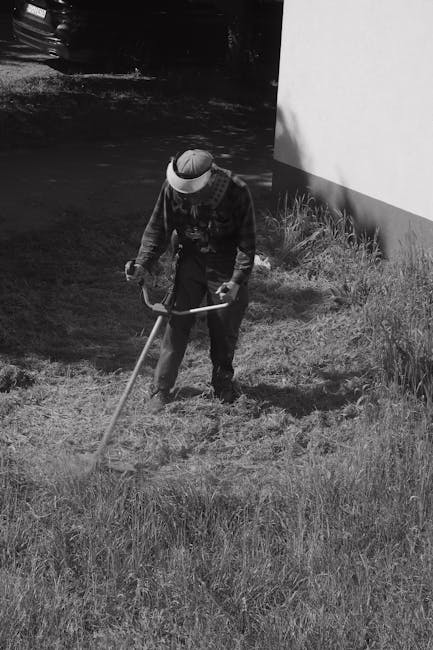
Step by step lawn repair plan used by professional gardeners UK
If your lawn has gone patchy, thin, bumpy, or full of moss after a wet British winter, you are not alone. The good news is that a proper step by step lawn repair plan used by professional gardeners UK is usually less about guesswork and more about doing the right jobs in the right order. That matters, because a tired lawn can look rough for months if you skip a step or rush straight to seeding.
This guide walks you through the same kind of practical approach a professional gardener would use on an average UK garden: assess the damage, improve the soil, fix drainage issues where possible, reseed or turf the bare areas, and then protect the recovery with sensible aftercare. It is written for real gardens, not showroom lawns. A bit messy, a bit seasonal, and very fixable.
Table of Contents
- Why this lawn repair plan matters
- How the repair process works
- Key benefits and practical advantages
- Who needs this plan and when it makes sense
- Step-by-step guidance
- Expert tips for better results
- Common mistakes to avoid
- Tools, resources and recommendations
- Law, compliance, standards and best practice
- Options, methods and comparison table
- Case study or real-world example
- Practical checklist
- Conclusion
- Frequently asked questions
Why Step by step lawn repair plan used by professional gardeners UK Matters
In the UK, lawns get hit by a lot: winter saturation, summer dry patches, shade from hedges and fences, heavy foot traffic, pet damage, and the occasional patch of stubborn moss that seems to arrive with no invitation at all. A lawn repair plan matters because the problems usually stack on top of each other. If you only treat the visible symptom, the issue tends to come back.
A professional approach starts with the cause. Is the lawn thin because the soil is compacted? Are there puddles after rain because water cannot drain? Has the grass been scalped by mowing too short? Or is the damage mostly from wear around a trampoline, washing line, or garden path? Once you know that, repair becomes much more effective.
This is also why gardeners often link lawn repair to broader care rather than treating it as a one-off job. A healthy lawn depends on regular attention, not a single rescue mission. If you need ongoing help after the repair, it is worth looking at garden maintenance support or a routine lawn mowing service so the grass does not slip back into the same condition.
Truth be told, many lawns do not need a dramatic overhaul. They need a calm, step-by-step reset. That is good news, because it means the fix is usually practical rather than expensive or disruptive.
How Step by step lawn repair plan used by professional gardeners UK Works
The method is simple in principle, though the details matter. Professional gardeners tend to work in a sequence that supports the grass rather than fighting it. First they inspect the site. Then they clear debris, correct the surface as much as possible, prepare the soil, introduce new grass seed or turf, and finally protect the area while it establishes.
That order is deliberate. If you seed onto hard, mossy, compacted ground, the seed struggles. If you ignore drainage, waterlogging can undo the repair. If you mow too soon, young grass gets damaged. If you feed before the roots are ready, you can stress the lawn instead of helping it. Small things, but they add up.
There is also a seasonal rhythm to the work. In most UK gardens, the best repair windows are usually spring and early autumn, when the soil is workable and the grass is more willing to grow. Summer repairs can work, but they need more watering. Winter repairs are often disappointing unless the weather stays unusually mild.
For lawns that need more than cosmetic attention, the repair may sit alongside wider garden work such as landscape gardening or even landscaping if the problem is tied to layout, shade, or drainage design. Sometimes the lawn is not the whole problem. Sometimes the garden is telling you something.
Key Benefits and Practical Advantages
A structured repair plan gives you better results for the same effort. That is the short version. The longer version is a bit more satisfying.
- Better germination: prepared soil and correct seed contact improve the chance of new grass establishing.
- Fewer repeat problems: addressing compaction, moss, thatch, or uneven ground helps prevent the same issue returning.
- Improved appearance: patch repair can quickly lift the whole look of a garden, even before the lawn becomes fully mature.
- Safer surfaces: levelling holes and hollows reduces trip risks, especially in family gardens.
- Lower long-term effort: a healthier lawn is easier to mow, feed, and keep tidy.
There is another benefit people sometimes miss: confidence. Once you know the lawn is being repaired properly, not just patched over, you stop second-guessing every brown patch after a dry week. That peace of mind is worth something, honestly.
And if the garden has got away from you a little, there is no shame in starting with clearance. Sometimes a proper garden clearance gives you the clean slate needed before any turf or seed work begins. Hard to repair a lawn when the area is buried under debris, clippings, or old roots.
Who This Is For and When It Makes Sense
This plan is a good fit if your lawn has one or more of the following issues:
- bare patches after dogs, children, or heavy use
- thin grass with soil showing through
- moss taking over damp or shaded areas
- uneven ground, dips, or small hollows
- scorched-looking areas after summer stress
- waterlogging, soft ground, or patchy root failure
- a lawn that looks tired even after mowing
It makes sense for homeowners who want a better-looking lawn without ripping everything out. It also makes sense if you are selling a property, planning a garden refresh, or simply trying to get the garden back to something respectable after a rough season. We have all seen a lawn go from decent to sad in what feels like two wet weekends and a month of neglect.
If the lawn is fundamentally beyond repair, or the soil structure is poor all over, repair may not be enough. In that case, a full re-turf or a more involved redesign can be the better call. Professional gardeners usually look at the evidence first rather than pushing one solution for every garden.
Step-by-Step Guidance
Below is the practical repair sequence used by professional gardeners in the UK. Not every garden needs every stage, but this is the usual order when the aim is a durable result.
1. Inspect the lawn properly
Start with a slow walk across the lawn. Look for dead grass, moss, weeds, hollow spots, standing water, compacted areas, and damage near paths or patios. Check where the lawn gets sun and shade during the day. A lawn on the north side of a house behaves very differently from one that gets full afternoon sun.
A good inspection also tells you whether the issue is localised or widespread. A couple of dog patches are different from a lawn that is thin across the whole plot. That distinction changes the repair plan.
2. Mow the grass to a sensible height
Before any repair, mow the lawn fairly short, but not scalped. You want enough leaf removed to expose the soil surface and make debris easier to clear, while still leaving the grass healthy enough to recover. Cutting too low can stress the lawn and make matters worse.
If the lawn is long and messy, a slow first cut may be better than an aggressive one. A decent gardener will often do two lighter cuts rather than one heavy chop. Less drama, better result.
3. Rake out moss, dead grass, and surface debris
Use a spring-tine rake or scarifier to lift moss, thatch, and loose material. This opens the surface and lets air, water, and seed reach the soil. If the lawn has a thick layer of thatch, the grass can suffocate a bit, like trying to breathe under a duvet. Not ideal.
For smaller lawns, manual raking may be enough. For larger or heavily compacted lawns, a mechanical scarifier can make the job quicker and more effective.
4. Deal with compaction and poor drainage
If water sits on the surface after rain, the soil may be compacted or poorly draining. Professionals may use hollow-tine aeration to pull out small plugs of soil and create channels for air and water. In very localised cases, simple spiking can help, though it is less effective than proper aeration.
This step often gets skipped by enthusiastic DIY gardeners, and that is where things unravel. You can sow beautiful seed into terrible soil and still get poor results. The soil has to cooperate.
5. Level hollows and repair bare patches
Small dips can be filled with a suitable topdressing mix. Bare areas should be loosened, lightly levelled, and prepared for seed or turf. If you have small rabbit-like holes, pet scars, or worn strips near gates, focus on these first because they tend to spread visually and make the lawn look worse than it is.
A light topdressing also improves seed-to-soil contact. That phrase sounds technical, but it simply means the seed is touching good growing material instead of sitting on top and drying out.
6. Choose repair by seed, turf, or patching
Not every repair needs a full reseed. For small isolated damage, patching with seed may be enough. For bigger bare sections, turf squares can give a faster finish. If the lawn is widespread thin and tired, overseeding across the whole area can be more effective.
The right choice depends on time, budget, season, and how much use the lawn gets. A family garden used every day may need a tougher, quicker recovery route than a decorative front lawn that gets little foot traffic.
7. Spread seed evenly or lay turf carefully
If you are overseeding, spread the seed evenly and work it lightly into the surface. Do not bury it too deep; most grass seed wants light cover, not a deep grave. If laying turf, stagger the joints like brickwork and press the pieces snugly together without stretching them.
With turf, speed matters. Fresh turf should not be left drying out in the sun or wind. It should be laid promptly and watered soon after. If the air feels still and warm, keep an eye on it. Even on a mild afternoon, turf can dry faster than expected.
8. Apply a light topdressing where needed
A thin layer of topdressing helps level minor imperfections and protect seed. It also supports germination by keeping moisture around the seed. Keep the layer light, though. Smothering the lawn is not repair, it is sabotage in fancy packaging.
9. Water consistently, but do not flood it
New seed or turf needs moisture. In dry spells, light and regular watering is better than the odd drenching. The aim is to keep the top layer damp while roots establish. Too much water can wash seed away or create soggy patches that slow recovery.
In practical terms, it often means checking the lawn more often during the first couple of weeks. A quick glance in the morning and again later in the day can be enough to catch drying edges before they brown off.
10. Avoid heavy use while the lawn establishes
This part is easier said than done, especially if kids and pets see the grass as their personal racetrack. But if you want the repair to hold, keep foot traffic down as much as possible until the lawn is properly rooted and visibly recovering.
For a small patch repair, that may only mean a week or two of caution. For a larger reseed or newly turfed area, it can take longer. Patience, annoyingly, is part of lawn repair.
11. Begin gentle aftercare and maintenance
Once the new growth is established, begin light mowing with a sharp blade and avoid cutting too short. Feed only when the lawn is ready, and keep an eye out for weed pressure at the edges. Regular maintenance then becomes the bridge between repair and long-term health.
At this stage, a dependable maintenance routine matters more than one-off enthusiasm. That is where a scheduled garden maintenance service can really help if you would rather not babysit the grass every weekend.
Expert summary: The best lawn repairs in UK gardens are rarely dramatic. They are methodical. Clear, prepare, repair, protect, then maintain. Skip the order and you usually pay for it twice.
Expert Tips for Better Results
Professional gardeners often rely on a few small habits that improve the outcome without adding much cost or complexity.
- Use a sharp mower blade. A blunt blade tears grass and leaves a ragged finish that looks tired very quickly.
- Match the repair to the season. Early autumn often gives strong results because the soil is warm and rainfall is usually more helpful.
- Do not overfeed stressed grass. A lawn that is already struggling needs support, not a sudden surge of fertiliser.
- Watch shaded zones separately. Under hedges or along fences, grass may need a different approach from the rest of the lawn.
- Keep edges tidy. Good edging around paths, beds, and patios makes the whole repair look neater, even before the grass thickens.
A small but useful tip: if a lawn has repeated damage where people step off a patio or through a side gate, think about the route as much as the grass. Sometimes a narrow hard-wearing path solves the problem better than reseeding the same tired strip for the third time. A gardener with a practical eye will notice that straight away.
If hedges are casting too much shade or blocking airflow, it may also be worth looking at hedge trimming. More light and air can make a real difference in damp British gardens, especially during the darker months.
Common Mistakes to Avoid
Most poor lawn repairs come down to rushing, overdoing, or skipping the boring bit. The boring bit, as it turns out, is usually the important bit.
- Seeding without preparation: seed on compacted soil rarely performs well.
- Cutting too short: scalping weak grass makes recovery harder.
- Ignoring drainage: if water sits there now, it will probably still sit there later.
- Overwatering: soggy soil can damage seed, turf, and roots.
- Using the wrong seed mix: a shady garden needs a different mix from a sunny, hard-wearing lawn.
- Walking on repairs too early: it feels harmless, but it compresses the surface and disrupts rooting.
- Applying too much topdressing: burying young grass is one of those mistakes that looks minor and causes major annoyance later.
And one more, because it comes up a lot: do not expect moss removal alone to fix a lawn. Moss is usually a sign of deeper conditions such as shade, damp, or compacted soil. Remove the moss, yes, but also fix the cause or it comes back looking smug.
Tools, Resources and Recommendations
You do not need a shed full of expensive kit to repair a lawn properly. In many gardens, a straightforward set of tools is enough.
| Tool or material | Best use | Why it helps |
|---|---|---|
| Spring-tine rake | Lifting moss and thatch | Clears the surface without being too aggressive |
| Scarifier | Heavier moss and thatch removal | Improves airflow and seed contact |
| Hollow-tine aerator | Compacted ground and drainage support | Creates channels for air and water |
| Topdressing mix | Levelling and seed support | Helps protect seed and smooth small hollows |
| Grass seed or turf | Re-establishing damaged areas | Restores coverage where grass has failed |
| Watering can or sprinkler | Aftercare | Supports germination and rooting |
For larger jobs, professional gardeners may use more specialised equipment and combine the repair with general turf care, mowing, or border tidying. If the site is part of a broader refresh, the lawn may be one element in a wider plan rather than a stand-alone fix. That is often the cleanest way to do it.
For homeowners who want a tidy, coordinated finish across the whole garden, services such as services overview can be a useful place to understand the wider options before choosing the right work package.
Law, Compliance, Standards and Best Practice
Lawns are not heavily regulated in the way some trades are, but professional gardeners still work with sensible standards and good practice. In the UK, that usually means using equipment safely, handling waste responsibly, and avoiding actions that might cause unnecessary damage to neighbouring properties or shared access areas.
For example, if a repair job involves clearing old clippings, soil, or green waste, responsible disposal matters. If a large amount of waste is involved, it may be handled as part of a wider clearance approach rather than simply left in bags on site. This is one reason some jobs sit naturally alongside garden clearance or broader maintenance work.
Health and safety is another straightforward but important point. Wet turf, sharp tools, lifting heavy bags of topdressing, and using powered equipment all carry practical risks. Good gardeners work carefully, keep paths clear, and avoid rushing. If you are hiring someone, it is reasonable to ask how they approach safety and insurance before work begins. A professional outfit should be comfortable discussing that.
Environmental care also matters. In everyday terms, that means avoiding waste, choosing materials sensibly, and not flooding the garden with unnecessary treatments. A repair plan should improve the lawn without creating avoidable harm elsewhere in the garden.
If you are comparing providers, it is sensible to review practical details such as insurance and safety and how pricing is explained. Clear expectations save headaches later. Not glamorous, but very useful.
Options, Methods, or Comparison Table
There is more than one way to repair a lawn. The right method depends on the condition of the grass, the time of year, and how quickly you need results.
| Method | Best for | Pros | Limits |
|---|---|---|---|
| Overseeding | Thin lawns with enough existing grass | Cost-effective, improves density | Slower to look full |
| Patch seeding | Small bare spots and dog damage | Targeted and simple | Needs good watering and patience |
| Topdressing + seed | Uneven lawns with light wear | Levels minor hollows and supports growth | Not enough for severe soil problems |
| Returfing | Large bare areas or fast turnaround needs | Immediate coverage | Usually higher cost and still needs aftercare |
| Drainage or layout improvement | Recurring wet patches or structural issues | Tackles the root cause | More involved and may need wider garden work |
If the lawn keeps failing in the same place, repair alone may not be enough. That is when a gardener starts thinking about the site layout, nearby trees, shade, runoff, and even whether the garden would benefit from changes to surrounding features. In those cases, wider landscape gardening can be the smarter long-term answer.
Case Study or Real-World Example
Here is a typical kind of job a professional gardener might handle in a UK family garden. A rear lawn has become thin through the middle, with two bare patches near the patio doors and a damp corner beside a fence. There is a mix of old moss, compacted soil, and a narrow worn path where everyone cuts across to the shed.
The repair plan would usually go like this:
- Cut the grass to a manageable height.
- Rake out moss and dead material.
- Aerate the compacted sections.
- Topdress the bare and uneven areas.
- Overseed the thin sections and patch seed the bare spots.
- Water lightly and consistently.
- Keep traffic off the area while it settles.
A few weeks later, the obvious gaps are smaller, the surface is flatter, and the lawn looks much more coherent. Not perfect, not instantly Wimbledon. But healthy enough to feel like part of the garden again. That is usually the win people are after.
If the problem is part of a bigger garden reset, it may be sensible to combine the lawn repair with hedges, borders, or access routes. Sometimes a tidy garden simply needs several small jobs working together rather than one dramatic fix.
Practical Checklist
Use this before, during, and after the repair. Simple, but handy.
- Inspect the lawn for patchy, thin, damp, or compacted areas.
- Mow to a sensible height without scalping the grass.
- Rake out moss, thatch, and loose debris.
- Aerate compacted areas if needed.
- Level hollows with a light topdressing mix.
- Choose seed, turf, or patching based on the size of the damage.
- Water lightly and regularly during establishment.
- Keep people and pets off the repaired section where possible.
- Use a sharp blade for the first few mows after recovery starts.
- Review why the damage happened so it does not keep repeating.
If you are unsure which steps your lawn actually needs, that is normal. Most gardens are a mix of problems rather than one neat issue. A quick, honest assessment saves time in the long run.
Get a free quote today and see how much you can save.
Conclusion
A lawn repair job does not have to be dramatic to be effective. In most UK gardens, the best results come from a sensible sequence: inspect carefully, prepare the ground, repair the damage, protect the new growth, and then maintain it properly. That is the real professional method, and it works because it respects how grass actually grows.
Whether you are dealing with a few bare patches or a lawn that has become tired across the whole garden, the same principle applies: fix the cause, not just the surface. Do that, and the lawn stands a much better chance of coming back strong. A bit of patience helps too. More than a bit, sometimes.
And when it starts to fill in again, with that fresh green look after rain and a neat cut under the evening light, you will know the effort was worth it. Small wins, but they matter.
Frequently Asked Questions
What is the best time of year for lawn repair in the UK?
Early autumn is often ideal because the soil is still warm and rainfall usually supports germination. Spring can also work well. Summer repairs can succeed, but they need more watering and closer attention.
Should I use grass seed or turf for bare patches?
Seed is usually cheaper and works well for smaller or less urgent areas. Turf is better when you want faster visual recovery or the bare section is larger. The right choice depends on budget, timing, and how much use the lawn gets.
Do I need to remove moss before reseeding?
Yes, usually. Moss can block seed-to-soil contact and signal underlying issues such as shade, compaction, or poor drainage. Removing it is helpful, but you should also deal with the cause where possible.
Can a damaged lawn be repaired without digging it all up?
Often, yes. Many lawns improve with raking, aeration, topdressing, and overseeding. If the soil is badly damaged or the drainage is poor across the whole area, more substantial work may be needed.
How long does lawn repair take to show results?
Small improvements can be visible within a few weeks, but fuller recovery takes longer. The timing depends on the weather, the repair method, and how well the lawn is watered and protected while it establishes.
Why does my lawn keep turning patchy in the same place?
Repeated damage in the same spot often points to a cause such as foot traffic, pet wear, shade, poor drainage, or compacted soil. Repairing the area without addressing the cause usually leads to the same problem returning.
Is lawn aeration really necessary?
Not always, but it is very useful on compacted or waterlogged ground. Aeration helps air, water, and roots move through the soil more easily, which supports healthier regrowth.
Can I repair a lawn in winter?
You can do some surface work in mild conditions, but winter is generally not the best time for seed-based repair in the UK. The grass grows more slowly, and wet soil can make the job harder.
How often should I water a newly repaired lawn?
It depends on the weather and the repair type, but the aim is to keep the top layer consistently moist without flooding it. Light, regular watering is usually better than heavy soaking.
What is the most common mistake people make with lawn repair?
Rushing the job. People often seed before preparing the soil properly, cut the grass too short, or walk on the repair too soon. The boring steps are usually the ones that make the difference.
When should I call a professional gardener?
If the lawn has widespread damage, poor drainage, uneven ground, or keeps failing in the same spots, a professional can usually diagnose the issue faster and recommend the right fix. It is also sensible when you want a tidy result without the trial-and-error phase.
Will regular mowing help my lawn recover?
Yes, once the grass is established. Regular mowing with a sharp blade keeps growth even and prevents the lawn from becoming scruffy. Just do not mow a newly repaired area too soon or too short.
If you are planning broader garden work as well, you may want to explore about the team behind the service, or review the practical details in pricing and quotes. A clear plan always feels better than a vague promise.
And if you are ready to move from patchy grass to a proper recovery plan, start there. Small steps, done well, really do add up.